
Thursday, February 23, 2006
Wednesday, February 22, 2006
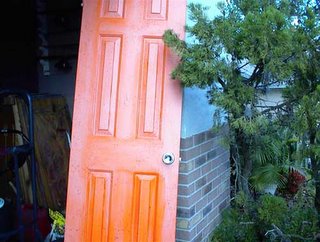
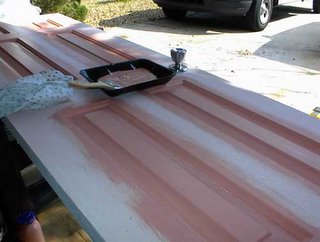
Glazing The Door
I use about 1 cup of commercial glaze (faux finish at home depot) and added just enough orange acrylic paint to get a tint. I then brushed it on the door in the same sequence as when I painted it. I let it dry about 20 minutes (while I glazed the door frame). I then mixed some burgundy acrylic with water to ink consistency and fly specked (dip the brush in mixture and flick the brush to get off excess paint and then flek on door) the entire door. Then the same with burnt sienna. Let dry, hang tomorrow...
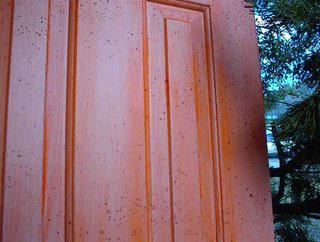
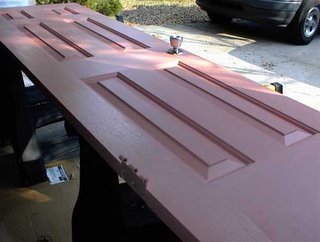
Close up of fly specks...
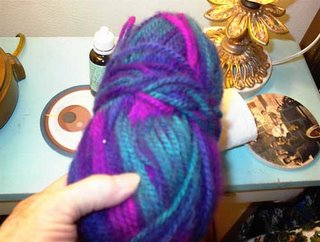
Update on Triangle tango...this is the right side so far.
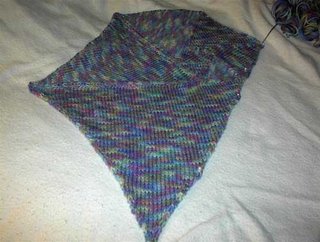
Close up of the top. I have no clue where the rest of the stuff goes hahahhaha...oh I'll go back to it soon and figure it out. I believe the other side is done the opposite so that there is no point. In other word, where the point is here at the bottom, it switches to the top on the other side and the shoulder becomes the bottom. So you have one chopped off side and one pointed side. It says to start in the back. I can't do that. So here is one front, now I'll knit another one just like it and make that one the back left. Then instead of following the instruction for the other side. I'll just repeat this same side only reversing (mirror image) and make two of those..One front and one back. Then figure out the sleeves..oh lord, these instructions are from hunger hahhahaha....
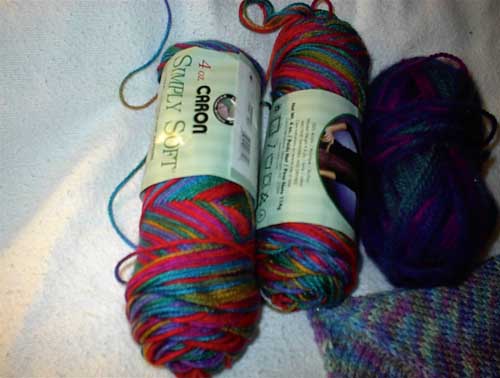
I found this real hot yarn at Joann's ...on sale, 2.19 I think. it's called crayon.
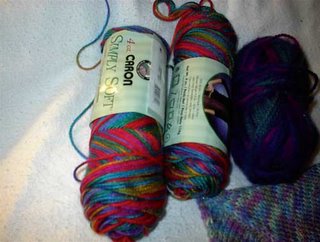
And that dark one besides the crayon ..here is a better pic...

Close up of fly specks...

Update on Triangle tango...this is the right side so far.

Close up of the top. I have no clue where the rest of the stuff goes hahahhaha...oh I'll go back to it soon and figure it out. I believe the other side is done the opposite so that there is no point. In other word, where the point is here at the bottom, it switches to the top on the other side and the shoulder becomes the bottom. So you have one chopped off side and one pointed side. It says to start in the back. I can't do that. So here is one front, now I'll knit another one just like it and make that one the back left. Then instead of following the instruction for the other side. I'll just repeat this same side only reversing (mirror image) and make two of those..One front and one back. Then figure out the sleeves..oh lord, these instructions are from hunger hahhahaha....
I found this real hot yarn at Joann's ...on sale, 2.19 I think. it's called crayon.
And that dark one besides the crayon ..here is a better pic...

Tuesday, February 21, 2006
Glazed Door
So you want to make a pretty door? here are some easy steps into that little venture. First get the retired hubby to help you take the door down. Well it's just two pins really. De-dust and sandpaper roughly, just a lick and a promise. De-dust again. I mixed sort of a flesh color (americana bottled acrylics). I added some sealer to the paint and started painting the six pannels in the middle of the door first. It's important to go with the grain of the wood. Just slush the paint on quickly into all the crevices (with the 1.00 brush from Michaels) and then lightly blend the paint with brush with the grain. Some of the paint will get outside the pannels, just go ahead lightly bush that paint with the grain. Here is the door with the pannels painted. Make sure to pick off the few hairs that fall from the cheap brush lol.
Here is the door all basecoated. Now while that is drying in the sun (most beautiful sunny day in Longwood Fl today, I'm in front of the garage). I went inside and basecoated the door frame and baseboards, oh this is in my shower, a real small deal. Now back outside and I applied the second coat to the door the same way as the first coat. I always put on two nice coats.
Doesn't it look pretty? it won't be that color once the glaze goes on though.
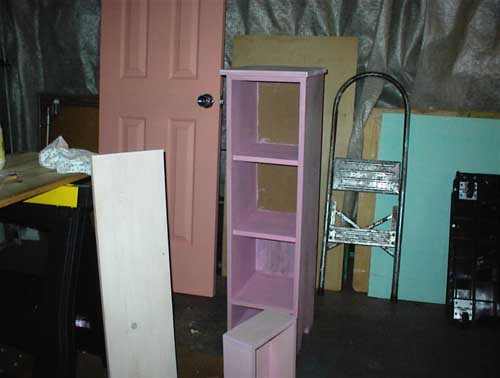
While I was in the painting mood and needing a little cupboard to put my yarn in and I have just the place for it in my bedroom. Well one of my bedrooms. Hubby and I sleep in all the rooms lol. One is for winter and one for summer. I took some white-lightning (sealer for decorative art, also one can do a pickled look with it). I added some burgundy to it to get a color that I call a ho pink (for lack of a better word lol). I sealed the entire cupboard with it. The little cupboard is custome made out of pine, has three shelves and a little drawer, real cute.
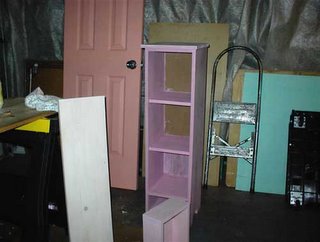 The door and the top of the cupboard I just put the plain white lightning ...as the door will have scene on it. Now the all these will cure for 24 hours. At which time I will glaze the door and put the basecoat on the outside of the little cupboard, which will be a wine color. In the inside back of the cupboard I will glue victorian calendar pictures later. I will post pictures as I do more to the projects.

Here is the door all basecoated. Now while that is drying in the sun (most beautiful sunny day in Longwood Fl today, I'm in front of the garage). I went inside and basecoated the door frame and baseboards, oh this is in my shower, a real small deal. Now back outside and I applied the second coat to the door the same way as the first coat. I always put on two nice coats.

Doesn't it look pretty? it won't be that color once the glaze goes on though.
While I was in the painting mood and needing a little cupboard to put my yarn in and I have just the place for it in my bedroom. Well one of my bedrooms. Hubby and I sleep in all the rooms lol. One is for winter and one for summer. I took some white-lightning (sealer for decorative art, also one can do a pickled look with it). I added some burgundy to it to get a color that I call a ho pink (for lack of a better word lol). I sealed the entire cupboard with it. The little cupboard is custome made out of pine, has three shelves and a little drawer, real cute.
 The door and the top of the cupboard I just put the plain white lightning ...as the door will have scene on it. Now the all these will cure for 24 hours. At which time I will glaze the door and put the basecoat on the outside of the little cupboard, which will be a wine color. In the inside back of the cupboard I will glue victorian calendar pictures later. I will post pictures as I do more to the projects.
Friday, February 17, 2006
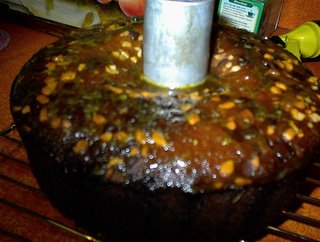
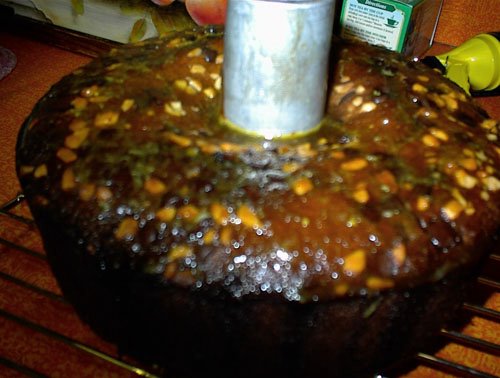
My Orange Cake. All the oranges in my yard were calling for an orange cake and I've been thinking about it so much lately so last night it happened. Now I have to totally control and ration myself.
3 sticks of butter, 1 box of brown suger (1pound), 6 eggs, 1 1/2 cup of fresh orange juice, 3 tabl of orange rind, 3 cups of sifted flour, 3 tabl of cointreau. 1 cup of orange juice and about 1 cup of chocolate chips/macadamia nuts mix. Also 1 cup of brown sugar extra for the sauce, 3 tbl cointreau.
Beat the suger and butter until kinda soft. Then keep adding the orange juice and beating until it's fluffy. Add the eggs, two at a time and beat slightly. Add the sifted flour and fold in, add grated rind and cointreau. Add the chips and fold in. Drop some chips all over the cake. Bake at 350 for 1 hour or until done. I used an angel pan and line the bottom with wax paper and covered the top of the cake with foil loosely. Meanwhile cook the the rest of the brown suger and juice for 5 minutes, add the cointreau. After cake has cooled a bit, poke holes in the top and pour the sauce. Let it rest a bit. Turn the cake onto a plate and pour the other half of the sauce on the bottom, which will be the top of the cake. the cake comes out sorta like a pudding cake. Delicious!! This shows the top of the cake before I turned it over and still on the middle of the tube pan. After pouring the sauce on the bottom, you turn it back to this side. I didn't bother.
Tuesday, February 07, 2006
Since I missed so many days I thought I'd better post some more right away. I don't know what's happening with my post but when I came back tonight my whole post was missing. It's a good thing I had save it as a draft too and was able to publish it again...all those pictures hmmmm....
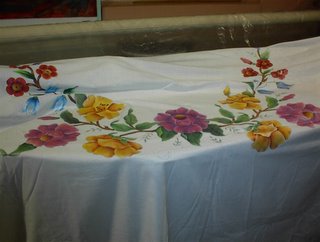
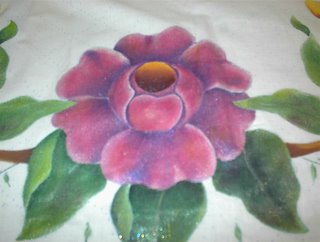
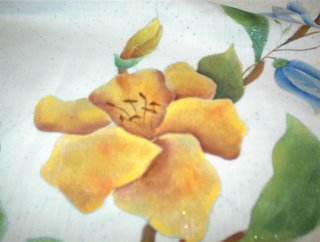
Well anyway, I decided to take a break from those clams and clean out my bins while looking for more colorways for my clam quilt. I threw out a lot of junk, organized the bins. I now know where everything is again lol. I found some real cool stuff. Remember when you could buy a bed spread or table cloth to embroider? Well a friend had bought several kits and gave me one years ago. Well I figured I wasn't going to do all that stitching so I began to paint it. It is 85% done. I must finish it and quilt it in a verigated thread. It will be lovely....
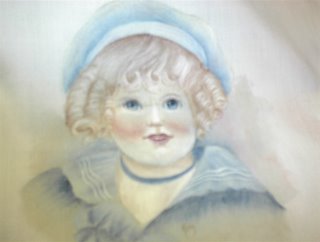
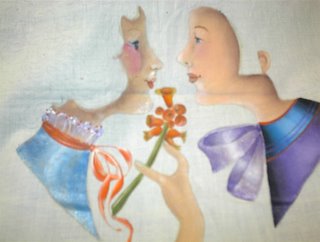
Then I found some painted quilt blocks...here is a victorian boy...
A folk art couple...just need to finish the hair.
And lots of odds and ends blocks. I will put all the odd blocks together and make a wierd quilt...here is attic windows...all done on the machine.
Well anyway, I decided to take a break from those clams and clean out my bins while looking for more colorways for my clam quilt. I threw out a lot of junk, organized the bins. I now know where everything is again lol. I found some real cool stuff. Remember when you could buy a bed spread or table cloth to embroider? Well a friend had bought several kits and gave me one years ago. Well I figured I wasn't going to do all that stitching so I began to paint it. It is 85% done. I must finish it and quilt it in a verigated thread. It will be lovely....


Then I found some painted quilt blocks...here is a victorian boy...

A folk art couple...just need to finish the hair.

And lots of odds and ends blocks. I will put all the odd blocks together and make a wierd quilt...here is attic windows...all done on the machine.

Monday, February 06, 2006
Ohhhh I have been so involved with my purchases from my gift cards. I have burned out three of them at 250.00 a crack. Boy! was that fun hahhahahah. I ordered several knitting books and have been reading those and some quilting books and this very neat software (e-bay) that can take any picture and make it banner size if you want ...that has yet to arrive. Well one the books was a "Kaffe Fassett"..I love him..he is coloratic like me. Well he had this Clamshell quilt in his book (K.F. Museum Quilts). He has a copy of the muesum quilt and one he made with his fabric line (georgous) except for the workmanship. I know it's a difficult quilt to make and he must have been on a timeline for the book and he must have had someone make it...oh I'm rambling.

Anyway, I don't think I have ever seen the Clamshell done machine wise. I would never touch it...too much hand sewing. Well I kept going back to that quilt. There must be a way says I. Needless to say, I went to bed at 5 am. I did three work-ups. On the sewing machine of course, I used the template in the book first and it was a bear to get this far. I knew there was something wrong with the template but at that time in morning it didn't register.
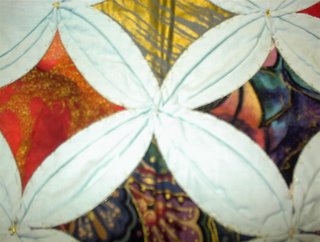
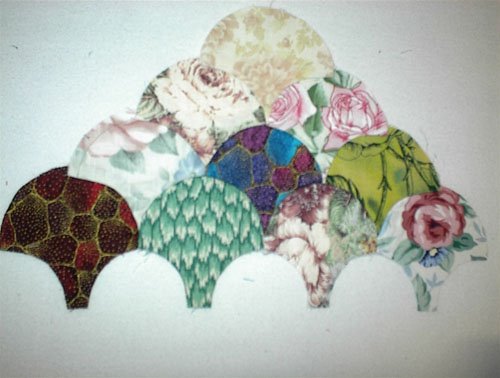
Ok, then I thought..there must be an easier way. I opened up Block Base in my computer and searched for clamshells. I found two. Ahhhh, you can print them any size, now that's the ticket! The bigger the better? I did the one where you can see the tail of the previous row extending down into the next row..sorta like when you have a space between your front teeth?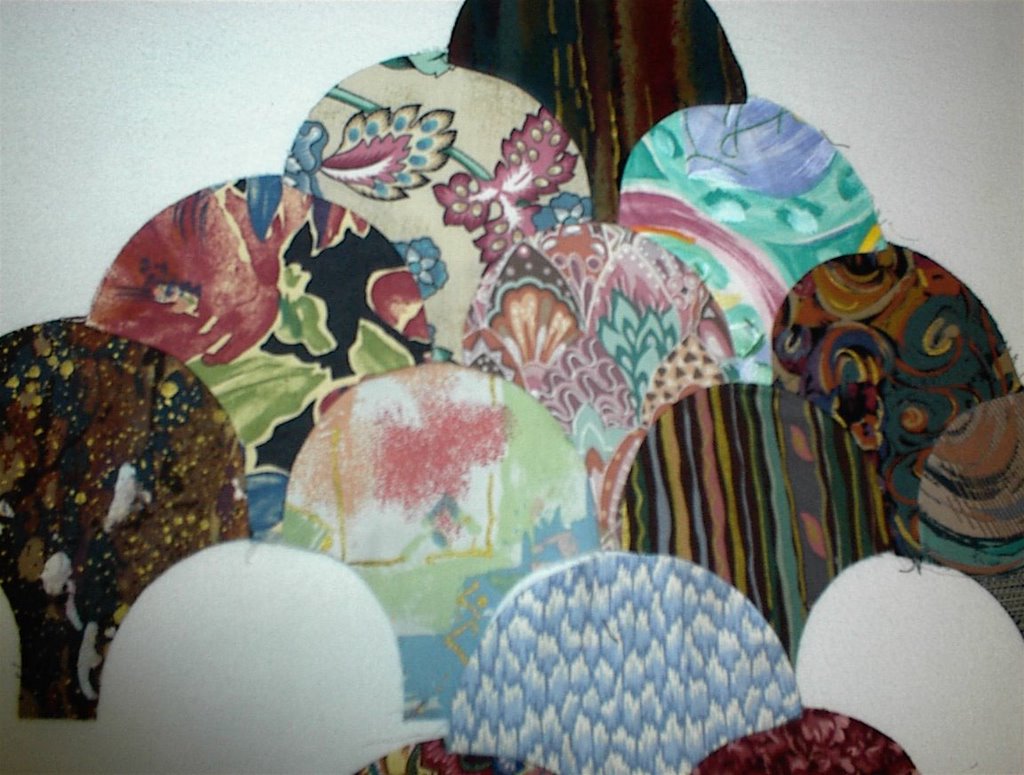
Then I did the other one and this one has a pointed tail, like the one in the book. By this time I really had the hang of it and found the error on the original template. The seam allowance needed to be extended another 1/8 of an inch...picky, picky but it makes a difference. Mind you, all this on the sewing machine. I am so impressed with myself, I hug myself lol. In order to succeed with this pattern ..one has to have a lot of patience..but after sewing 35 of them together, I find it's is very doable. Now I dont' know which one I like the best...help!!!

There is fabric everywhere....these are decorative samples from the home decorating line. I have at least three bins worth..they are great for when I need to practice on blocks before going to my stash. ..never- the - less...these still turn into beautiful quilts. I waste nothing.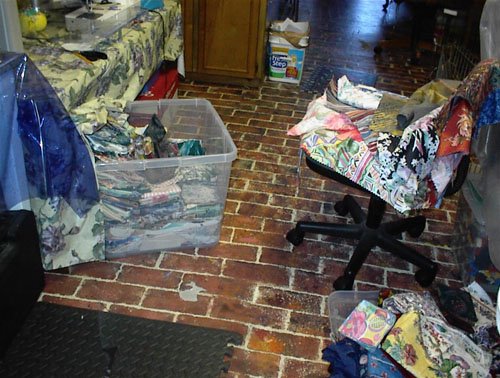
Then I went back to the orginal small clam and added another row with the new template and it went a lot easier.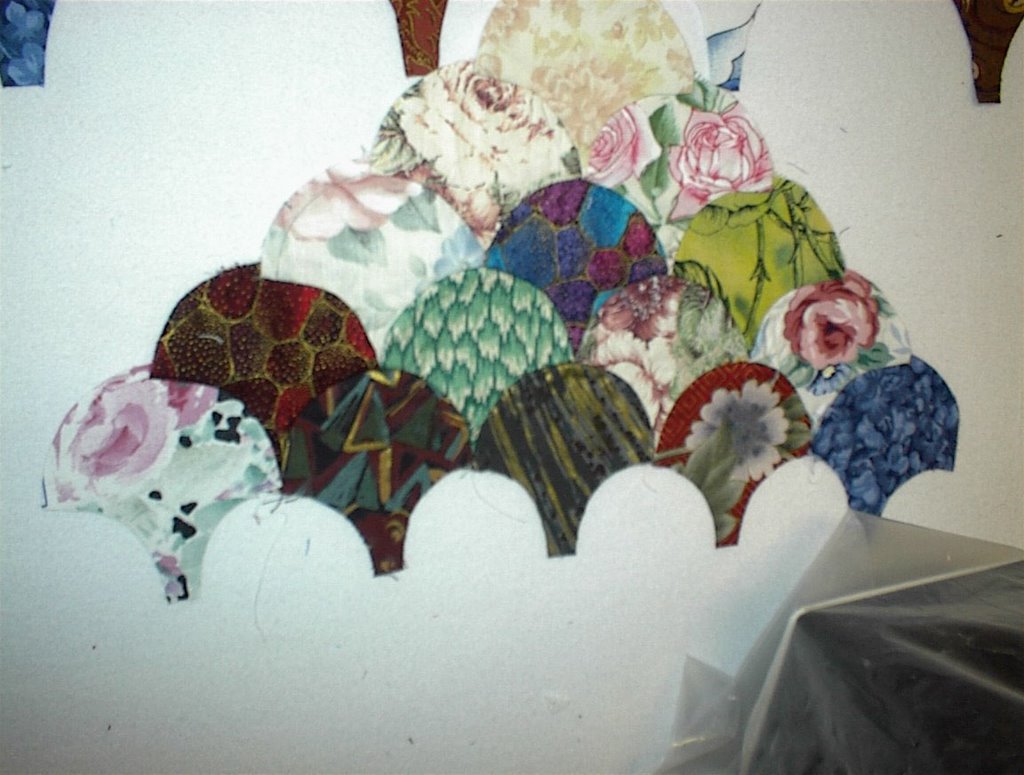
The clam shell are made in a diamond shape and there are 49 clams (the original small size) in each diamond. I see he has about 6 diamonds and the half ones for the sides and tri's...oh boy!! but if I do the big ones? well let me poll you. Which one do you like the best. Which one looks the best or shows off the design the best. I also just read in the book that he and a student worked on it it and she did a great job of ironing out the kinks lol...he said it wasn't quilter quality....it looks good if you didn't look too close. I think the student did well for a quilt like this.
To top the day off ...Deco American sent me a huge box of all the latest fabric craze stuff...fashion beads, writers, new paint ..all fabric related (I'm still one of their helping artists)...I get to try all the new stuff. I will definately do something fun with them soon.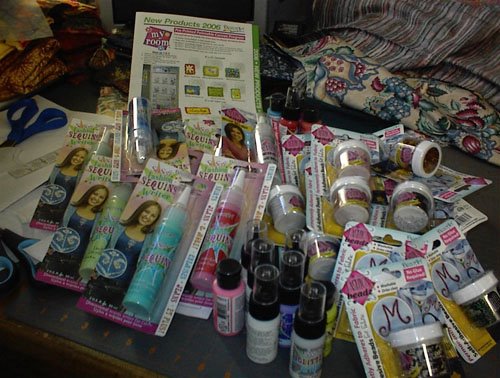
Subscribe to:
Posts (Atom)


